Document
MULTI PIXEL DOCUMENT
APP CONFIGURE TUTORIAL
————————————————————————————————
- Created: Nov 2019
- By: https://www.omegatheme.com/
- Email: contact@omegatheme.com
This is documentation on the Facebook Multi Pixel app application, which will help you to configure your app in the right way.
⭐️ Installation
Step 1: Log into your Shopify account in App Store. Click the ADD APP button to buy the app for your store.
Step 2: You will then be redirected to your admin page to install our app
Step 3: After press Install app, and activate the app charge, it will be automatically installed and be ready right away for you to use in the Apps section.
Please note that during the trial period, you will not be charged. Shopify only charges when you pass the trial period
⭐️ How to add Pixel ID to your store
After installing Multi Pixel app you will be directed to the Multi Pixel admin page

Step 1: Go to Event Manager and copy your Pixel ID from there

Step 2: Go back to our app, click Add Facebook Pixel and paste the pixel ID in the bar

Step 3: Choose the active status of the app: Enable or Disable
Step 4: Choose pages to track the pixel events
It tracks all conversions including Product, Collection, Product’s tag, Product’s type.
The Facebook Pixel you setup will then appear on the section below:

You can edit your Pixel by clicking on the Edit button
If it shows 0, it means you are setting the pixel to track on all pages and all products. If you want to edit to assign to the specific items/ pages only, just click on the number to change.
Step 5: Click Save when done with all setting
Step 6: Go to your store to check if it’s working
Click to see the preview and check.
Use Facebook Pixel Helper to see if it’s working or not

Go to the Troubleshoot Pixel and View Analytics to retrieve Pixel data and deeper analytics.
Now when you’re browsing your website you’re going to see that pixel every time that you view your content, every time you add something to the cart, every time you initiate checkout, every time you view anything on the page and most importantly every time a purchase happens.
Do the same steps if you want to add another Pixel ID in the app
⭐️Set up conversions API
iOS 14 updates might affect advertising with Facebook, tracking data on your browser will not let you optimize Ads Campaigns effectively, you can implement Conversions API to get data from servers which gives you a hand to gain additional insights into people who take actions on your website.
Step 1: Enable Conversions API (BETA) under the pixel ID you have set up

Step 2: Input Facebook access token
Check out how to generate token access here:
If you want to test event, you can use the test event code to test the conversions API events.
Check here to see how to get test event code:
And how to test events for conversions API here:
⭐️ Settings for Conversions API

If your browser already tracks all events except purchase, you can only enable Purchase event for Conversions API, but if you are afraid the browser side can't track all events, you can enable all
For the parameters, it is used for the pixel to match the data on Facebook through the server side, we recommend to enable all so that the matching point can be the highest.
⭐️Go to plans page

The original app charges will include multiple pixels and 1 conversions API. If you want to add more conversions API for your pixel in the app, you can go here to upgrade.
You can see how many conversions API you are having and enter the number you want to add more. Each additional conversions API will be charged $3.
⭐️ How to protect your Facebook pixel
When you use multi pixels, some people can do some fraudulent activities on your pixels. To solve this, please do as follow:
Go to Facebook Event Manager
Select your pixel and go to Settings
Move down to Traffic Permissions and select Create Allow List
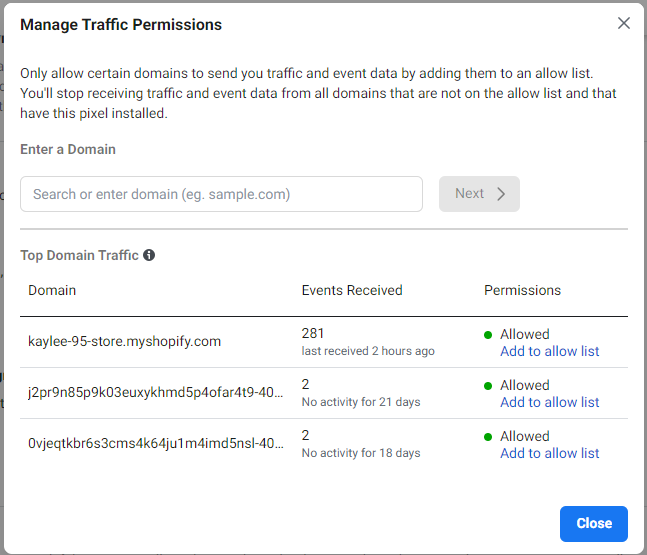
Enter your Domain --> Select Confirm and Close
✏️ If you have any problems when using Multi Pixel app please do not hesitate to contact us at contact@omegatheme.com, our support team will make sure your problem is solved as soon as possible.